
Blog
Welcome

Recent posts
SEARCH RESULTS FOR: Layouts

There are 10,000,002 ways to create a Queensberry … approximately … but who's counting?! We’re proud of our huge range of materials, colours, cover styles, page types, paper stocks, and embossing and print options. With them you can create something truly unique. But with lots of choice come lots of decisions. It can be like ordering at a fabulous restaurant with a 10-page menu, wishing you could have it all. So we thought we’d use our new sample album to demonstrate how to simplify your design choices and create unique "looks" that complement To View More >>


If you love Panorama Flushmount albums, chances are the full bleed, uninterrupted layouts are one reason why. This 12x12 album by Birch & Wattle of Sydney, Australia, makes great use of panorama images. What also caught our eye was the warm and joyful imagery of Fleur and Steve's wedding. Yana shared some stand-out moments from the day, and some thoughts about their photography business. "We are Pavel and Yana - professional wedding photographers, based in Sydney, who specialise in natural, genuine and emotive story-telling To View More >>

Here's a look at what goes on in the Queensberry printery — prints, album layouts and canvases being created under the expert eyes of our technicians. Quality is paramount to us. Queensberry print makers Chris and Alex chat about some of our print options, and their own hands-on, eyes-on approach. Printing your photographs is a hands-on process at Queensberry, and we're sticklers for detail — every step is subject to strict scrutiny, and monitored closely from start to finish. But preparing your files properly is just as important to getting To View More >>

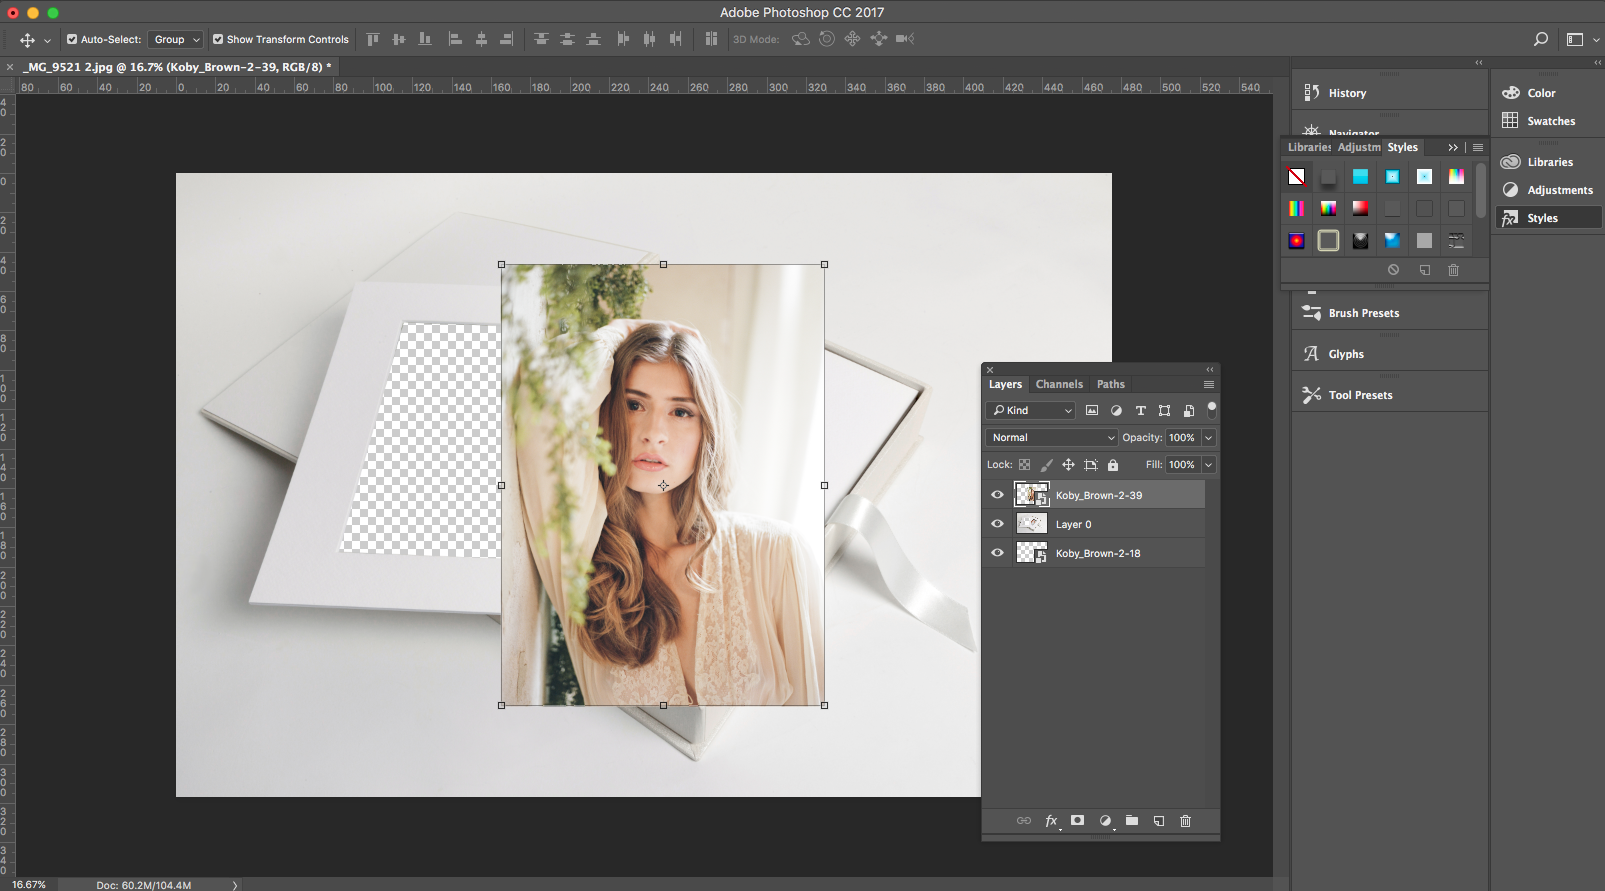
If you haven't seen our brand new frames, you need to take a look! They've got away to a cracking start since we launched them. But you might be wondering — How can I show frames online without spending heaps on samples? Which ones should I offer? What would they look like with my photographs? The answer? Our new stock image templates for frames. They're free to use anywhere you're selling. Download our PSD layouts, insert your own imagery and you'll have a virtual product complete with your own photography. Our stock templates for frames To View More >>
Our new Online Album Designer is a great on the go resource that makes designing and editing books and albums quick and easy. Today we show you how you to swap images around in the design. To switch images on the same layout: Drag and drop one image over the other. They will change places. To switch an image with another on a different layout: Click one of the images you want to switch and drag it to the side of the screen, which will allow you to scroll through the layouts. When you get to the layout you want, drag the image you're moving over the image To View More >>

Photographs are the most personal of gifts! Talking about Christmas and the holidays in October seems a little weird, but the holiday season does seem to start earlier every year – and when it comes to marketing, it pays to be prepared. The festive season is a great time to promote yourself to existing customers. You've spent all year taking photographs, so why not maximise the profit on each shoot with online galleries, product sales and special offers? We spoke to retiring Queensberry account manager Michelle about her tips for holiday promotions, and marketing pointers To View More >>
There's no substitute for display samples that your customers can touch and feel, but you can give your clients a wider "trade show experience" in your marketing materials and website with our new stock image downloads. They're free to use anywhere you're selling. Download our PSD layouts, add your own imagery to our layout shots, and you'll have a virtual product complete with your own photography! Maybe you can even help your clients envisage their purchase by using images from their own shoot. It's quick and easy in Photoshop, and we'll To View More >>

Be bold, make a statement, choose a Panorama Flushmount. Just over a year ago we released our Panorama Flushmount albums. With pages creased at the spine, not cut. Seamless, and perfect for bold and beautiful Imagery. But not only can you design stunning, uninterrupted panoramic layouts, you can add more pages as well. Simply select our medium- rather than heavy-weight option. Our new medium panoramic albums take up to 45 pages in total (90 sides) whereas with traditional heavy-weight pages the limit is 30 (60 sides). Panorama albums have raced away to To View More >>

If you're a regular user you’ll have noticed big changes to Workspace over the last few weeks. We introduced a stack of functional changes, especially to the album set-up and client website pages, but also... 1. We've improved the navigation, so the important stuff is easier to find. We're hoping the BUY and SELL tabs help direct you to the most important functions in Workspace for many people — ordering from Queensberry, and setting up a shopping cart to make your own sales. Alongside are direct links to your image galleries, your book and album designs, and your website, To View More >>

Ok it's not the same as getting a new iPhone for Christmas but for the inner Photojunction tech support geek it gets pretty close. Same with all you power users out there I reckon. For me the big one is the first... A new shortcut for choosing standard aperture sizes Instead of selecting an aperture size from the pop-up menu you can now use keyboard shortcuts to increase or decrease an aperture to the next standard size. • For Mac OSX Command+Shift+I and Command+Shift+K • For Windows Control+Shift+I and Control+Shift+K. Next we have not one, not two but three new right-click functions [caption To View More >>
Email: info@queensberry.com
Free Phone Numbers:
New Zealand: 0800 905 905
Australia: 1800 146 251
USA: +18668350851
UK: 0800 808 5271
Canada: +1 855 581 0370